

개요
만들어진 rest api 를 보면서 힙스터가 어떻게 동작하는지 확인해 보자. rest api 테스트는
postman 을 통해서 진행할 예정이다. postman 설치방법은 아래 링크에 정리해 두었다.
jhipster 백엔드 실행
터미널을 열어 아래 명령어를 입력한다.
1 | ./mvnw |
jhipster 프론트 실행
새로운 터미널을 열어 아래 명령어를 입력한다.
1 | npm start |
유저관련 api 확인
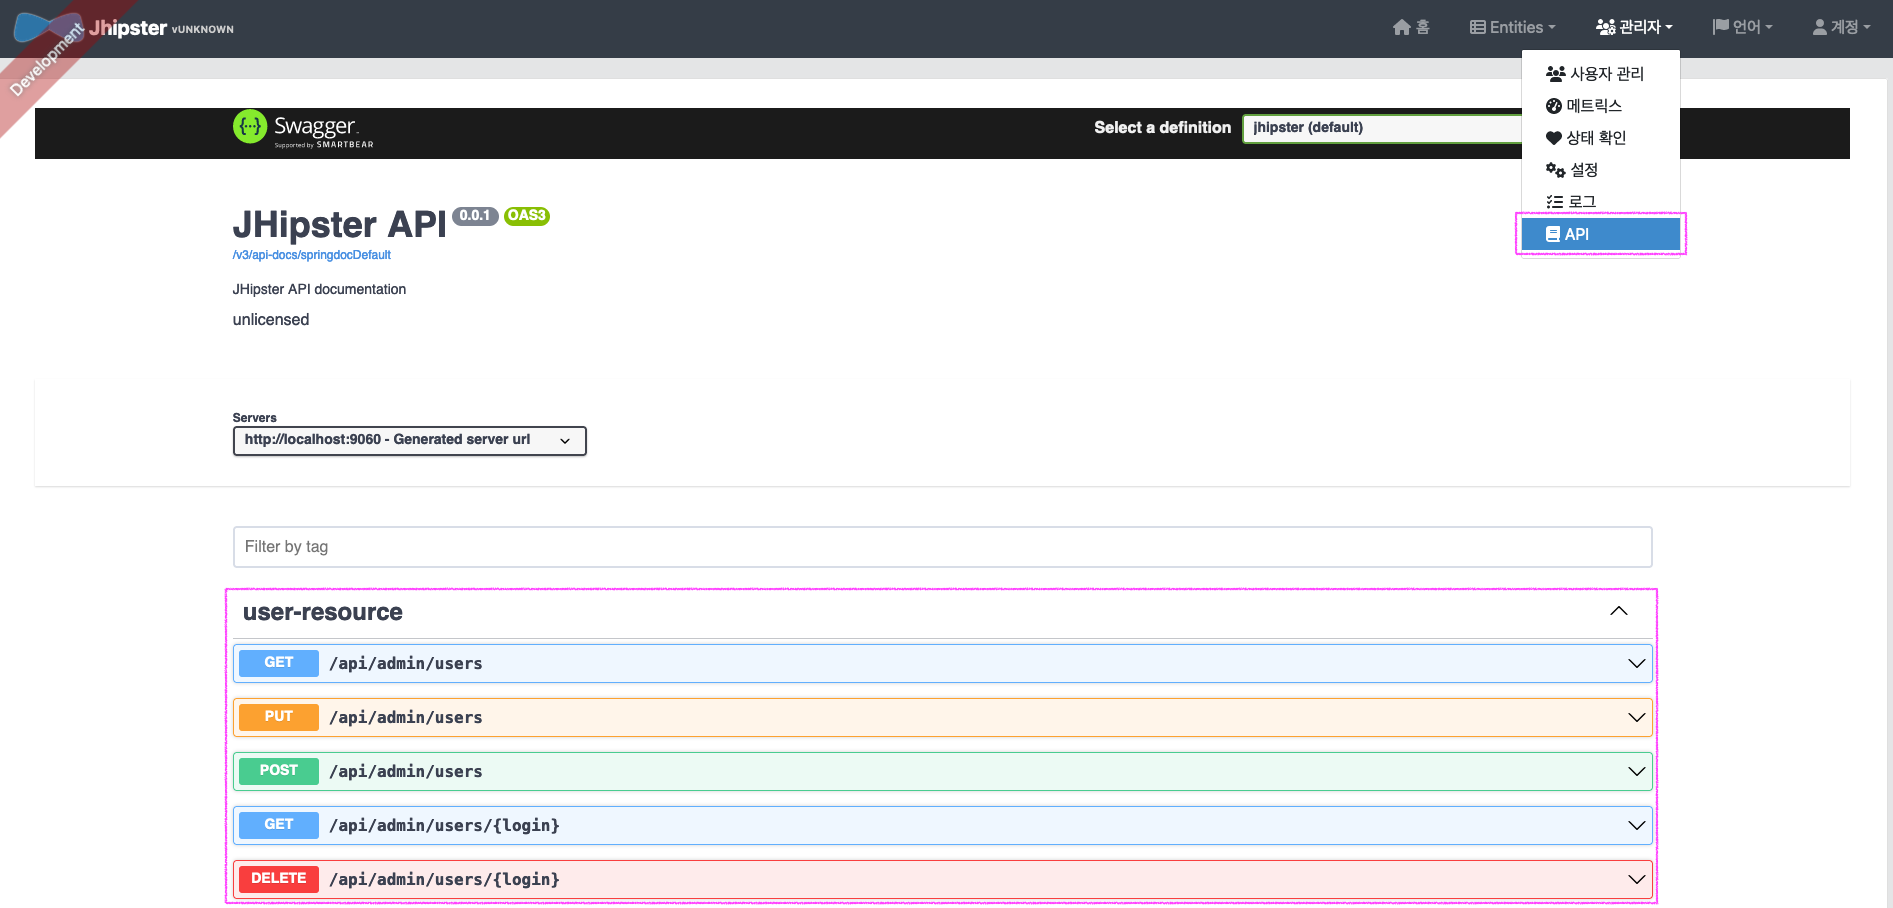
관리자 > API 메뉴를 클릭하여 user-resource api를 확인한다.
사용자 리스트와 수정 등록 삭제와 관련된 api가 있다.
이를 테스트해볼 예정이다.
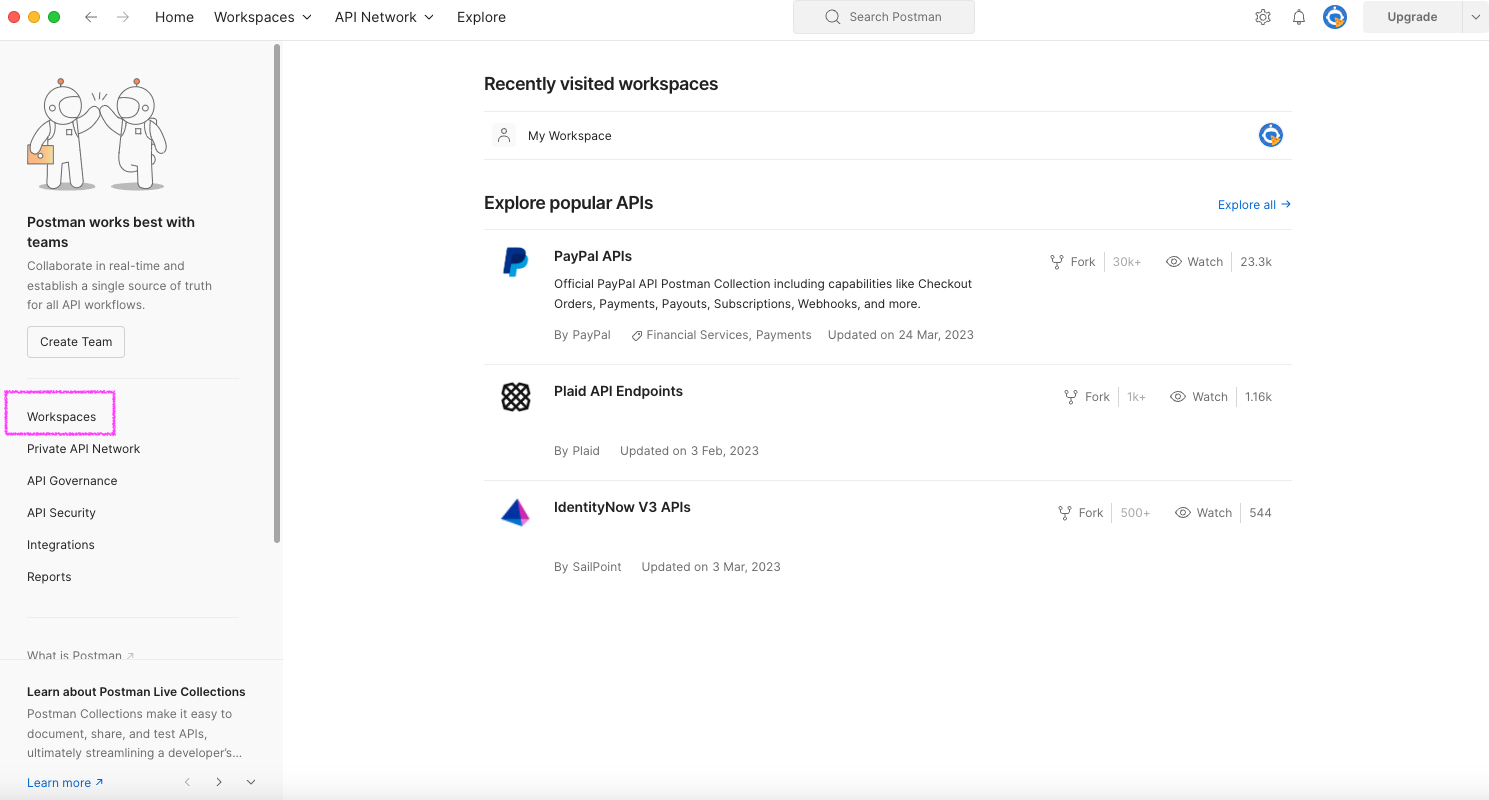
postman 실행
포스트맨을 실행하고 workspaces 메뉴를 클릭한다.
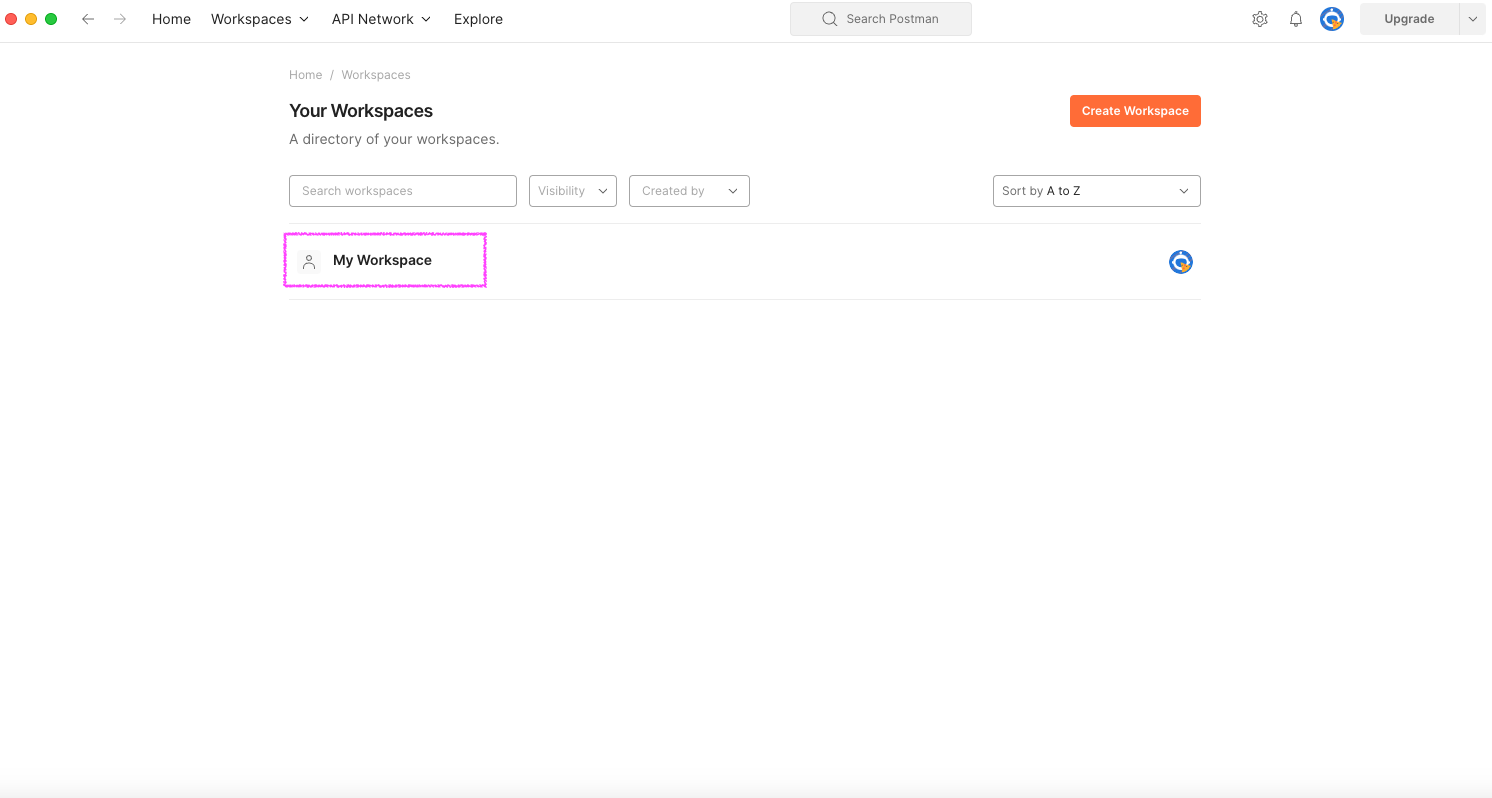
My Workspace 를 실행한다.
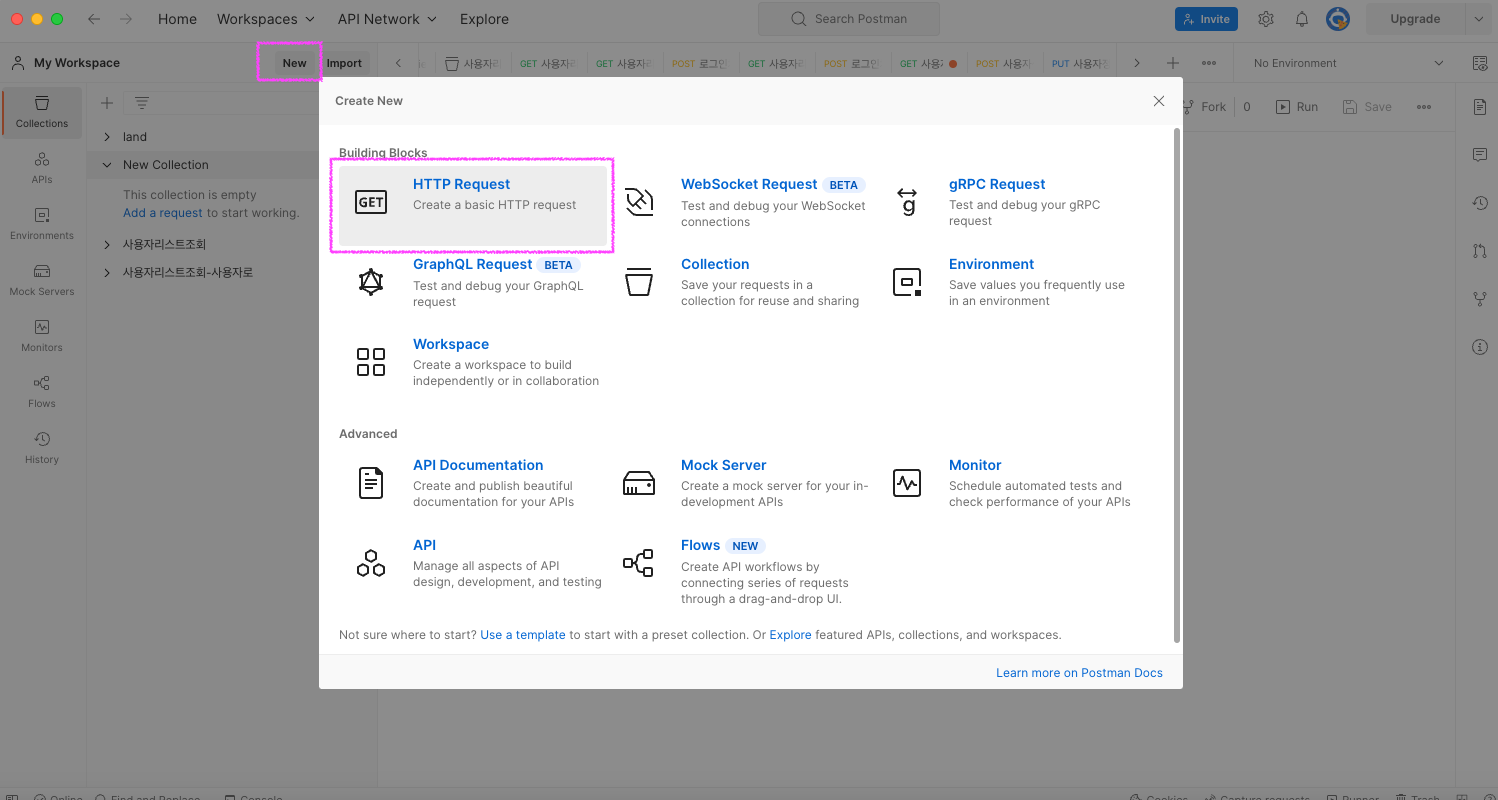
Collection 에서 + 이이콘을 클릭하여 새로운 콜랙션을 생성한다.
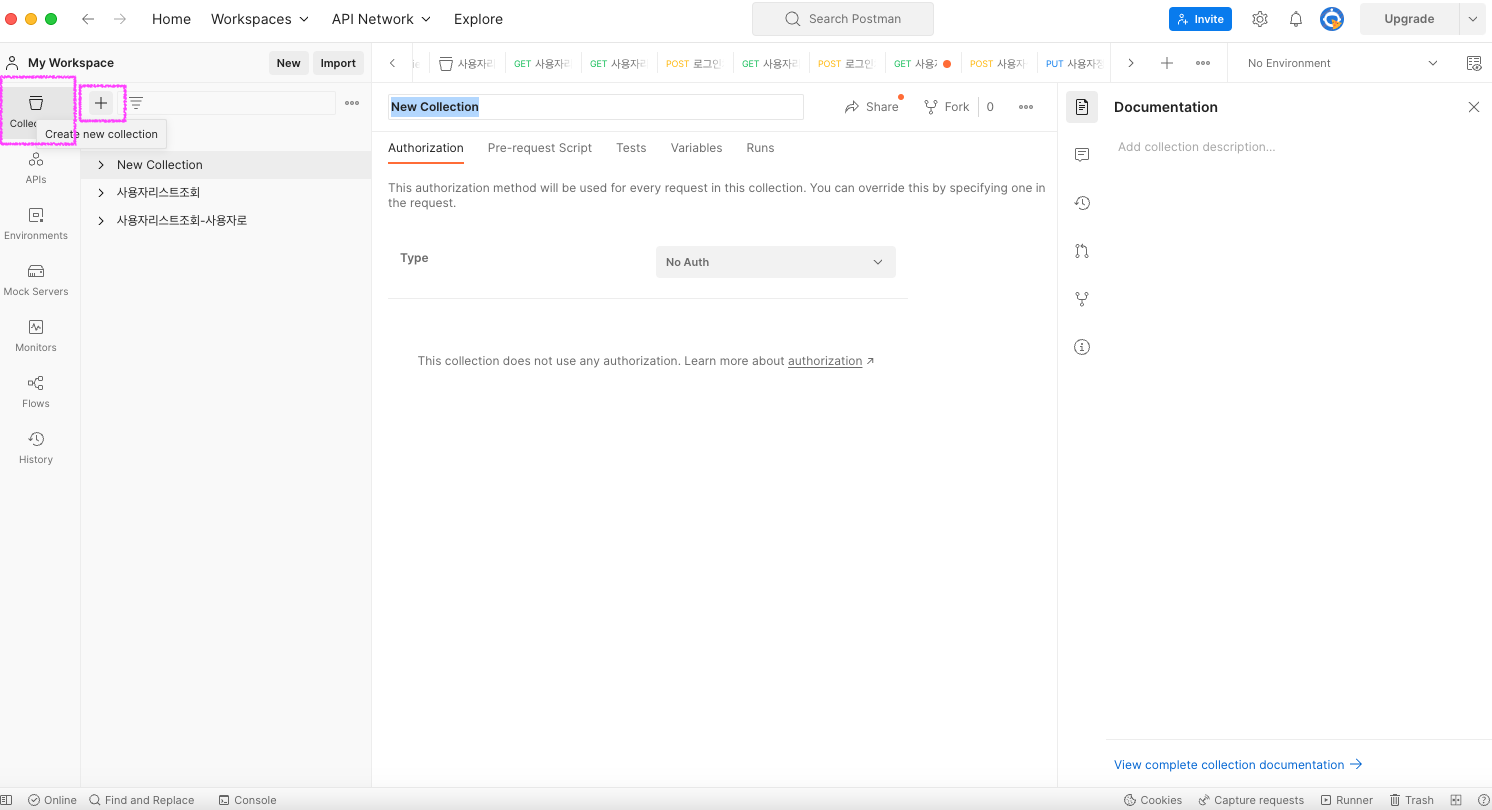
new 버튼을 클릭하여 http request 를 선택한다.
사용자 리스트 조회 - 인증없이 api 호출
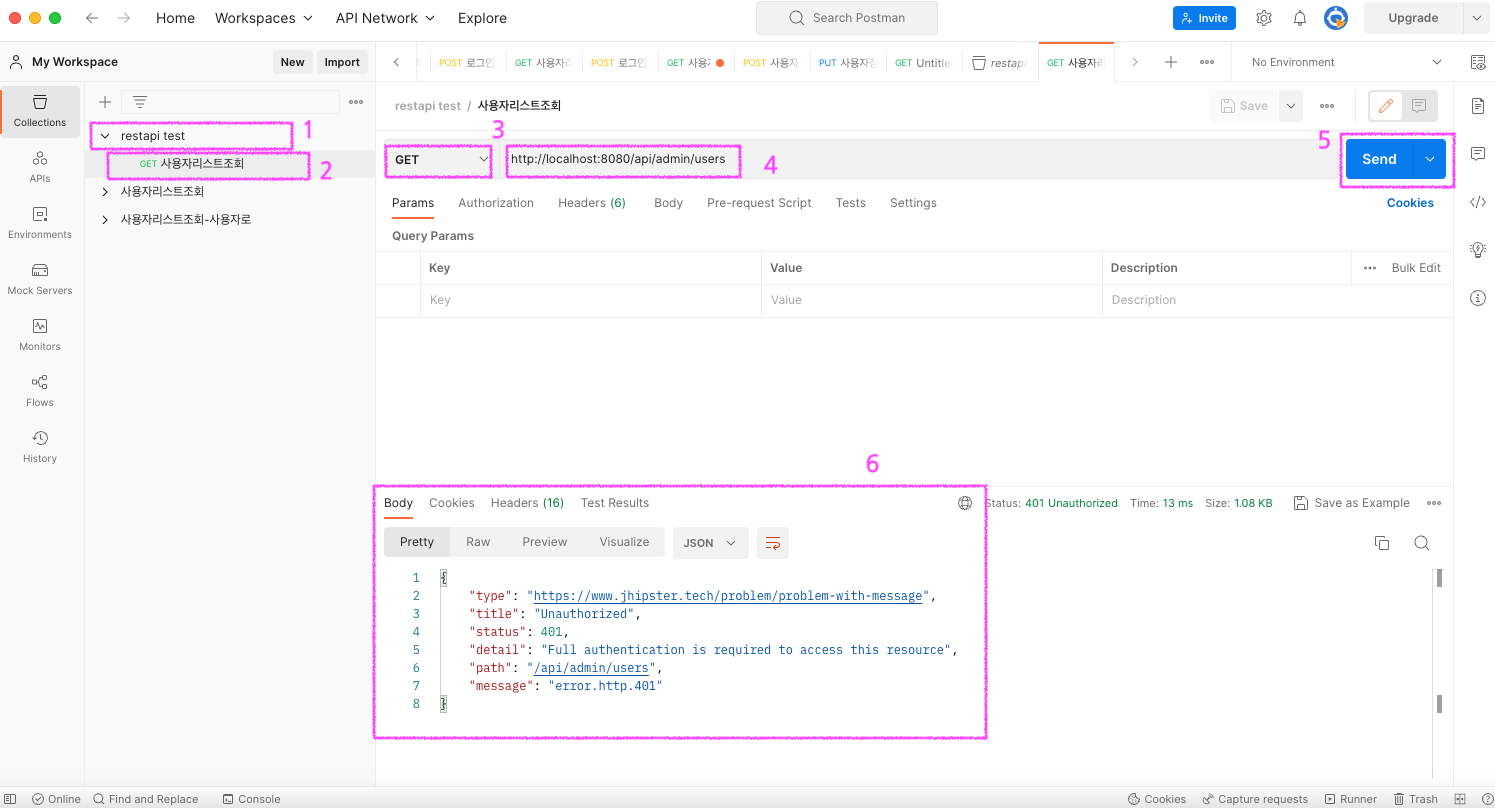
- 콜랙션 이름 restapi test
- api 이름 사용자리스트조회
- request 방식은 get 방식
- url : http://localhost:8080/api/admin/users
- send 버튼 클릭
- 로그인하지 않은 상태에서 사용자를 조회를 진행하여 Unauthorized 오류 메시지가 리턴되었다.
로그인후 인증 토큰 받기
- 사용자리스트조회 api 에서 우클릭 버튼을 클릭하면 api를 복제하는 메뉴가 있다 Duplicate 클릭하여 하나 복제한다.
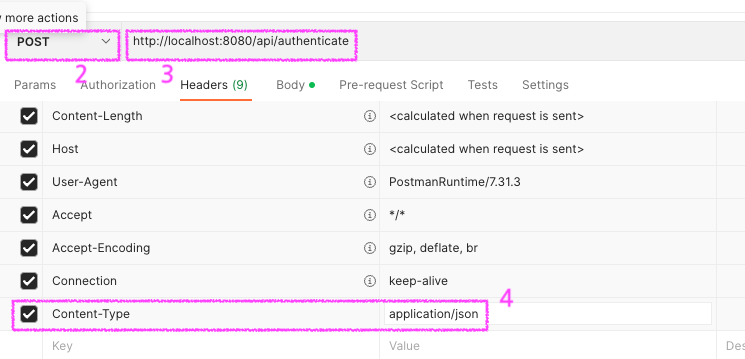
- Method 는 Post
- url : http://localhost:8080/api/admin/users
- Headers Content-Type application/json 추가
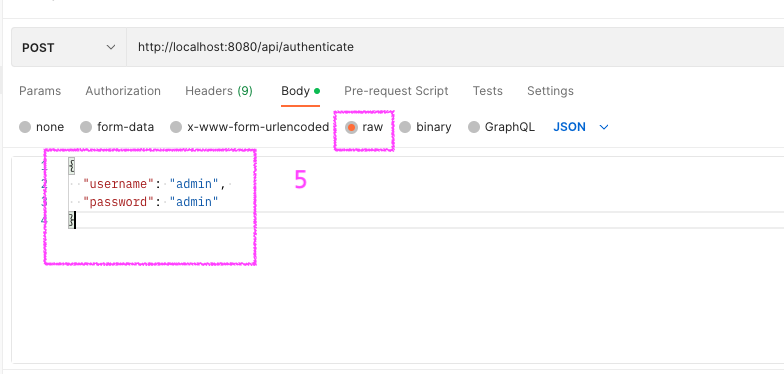
- Body 부분에 raw 를 선택하고 아래와 같이 코딩한다.
1
2
3
4
{
"username": "admin",
"password": "admin"
}
- Send 버튼을 클릭하면 id_token 값을 리턴받는다.
1
2
3
{
"id_token": "eyJhbGciOiJIUzUxMiJ9.eyJzdWIiOiJhZG1pbiIsImF1dGgiOiJST0xFX0FETUlOLFJPTEVfVVNFUiIsImV4cCI6MTY4MDE0MzEwM30.5WdbnKr_jizyraHs7cDswZLXf4rtu9in4a3RPljX-I8QLpvvSfx8fcyMe3emkFZRGN8tFO85R0noGCphnFME0w"
}

사용자 리스트 조회 - 인증후 api 호출
사용자리스트조회 api를 하나 복제한후 Headers 부분에 아래와 같이 Authorization Bearer “id_token” 값을 입력하고
Send 버튼을 클릭한다.
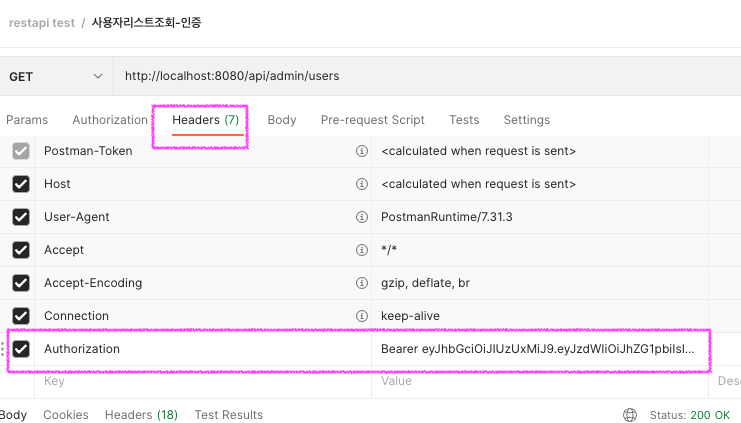
그러면 아래와 같이 등록된 사용자 리스트가 리턴된다.
참고
Bearer 는 인증 프로토콜에서 사용되는 용어 중 하나로, 인증 토큰을 전송하는 방법 중 하나이다.
Bearer 토큰은 API 요청 헤더에 포함되며, 인증 서버에서 발급한 토큰이 유효한지를 확인하는 데 사용된다.
Bearer는 “소지인”을 의미하는 단어로, 토큰 소유자가 API 요청을 보내는 클라이언트 애플리케이션을 의미한다.
Bearer 토큰은 단순 인증 토큰을 전송하는 데 사용되며, 인증 토큰 자체에는 보안이나 권한 부여와 관련된
정보가 포함되어 있지 않다. 따라서 Bearer 토큰은 안전한 통신 채널(HTTPS)을 통해 전송되어야 한다.
1 | [ |
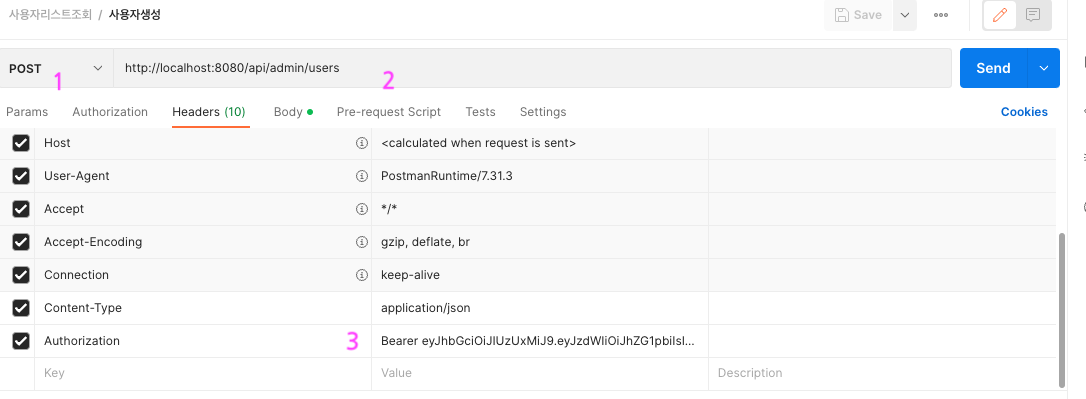
사용자 생성 테스트
- Method : Post
- url : http://localhost:8080/api/admin/users
- Authorization : Bearer eyJhbGciOiJIUzUxMiJ9.eyJzdWIiOiJhZG1pbiIsImF1dGgiOiJST0xFX0FETUlOLFJPTEVfVVNFUiIsImV4cCI6MTY4MDE0MzEwM30.5WdbnKr_jizyraHs7cDswZLXf4rtu9in4a3RPljX-I8QLpvvSfx8fcyMe3emkFZRGN8tFO85R0noGCphnFME0w
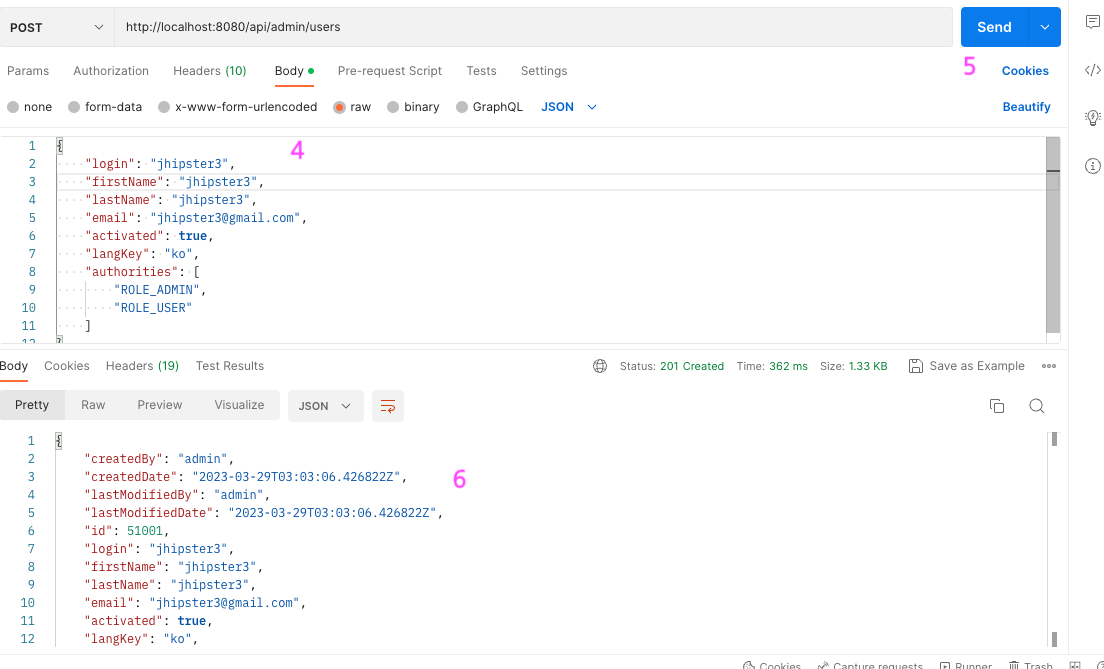
- Body 부분에 아래와 같이 입력
1
2
3
4
5
6
7
8
9
10
11
12
{
"login": "jhipster3",
"firstName": "jhipster3",
"lastName": "jhipster3",
"email": "jhipster3@gmail.com",
"activated": true,
"langKey": "ko",
"authorities": [
"ROLE_ADMIN",
"ROLE_USER"
]
} - Send 버튼클릭
- jhipster3 유저가 생성되었다.
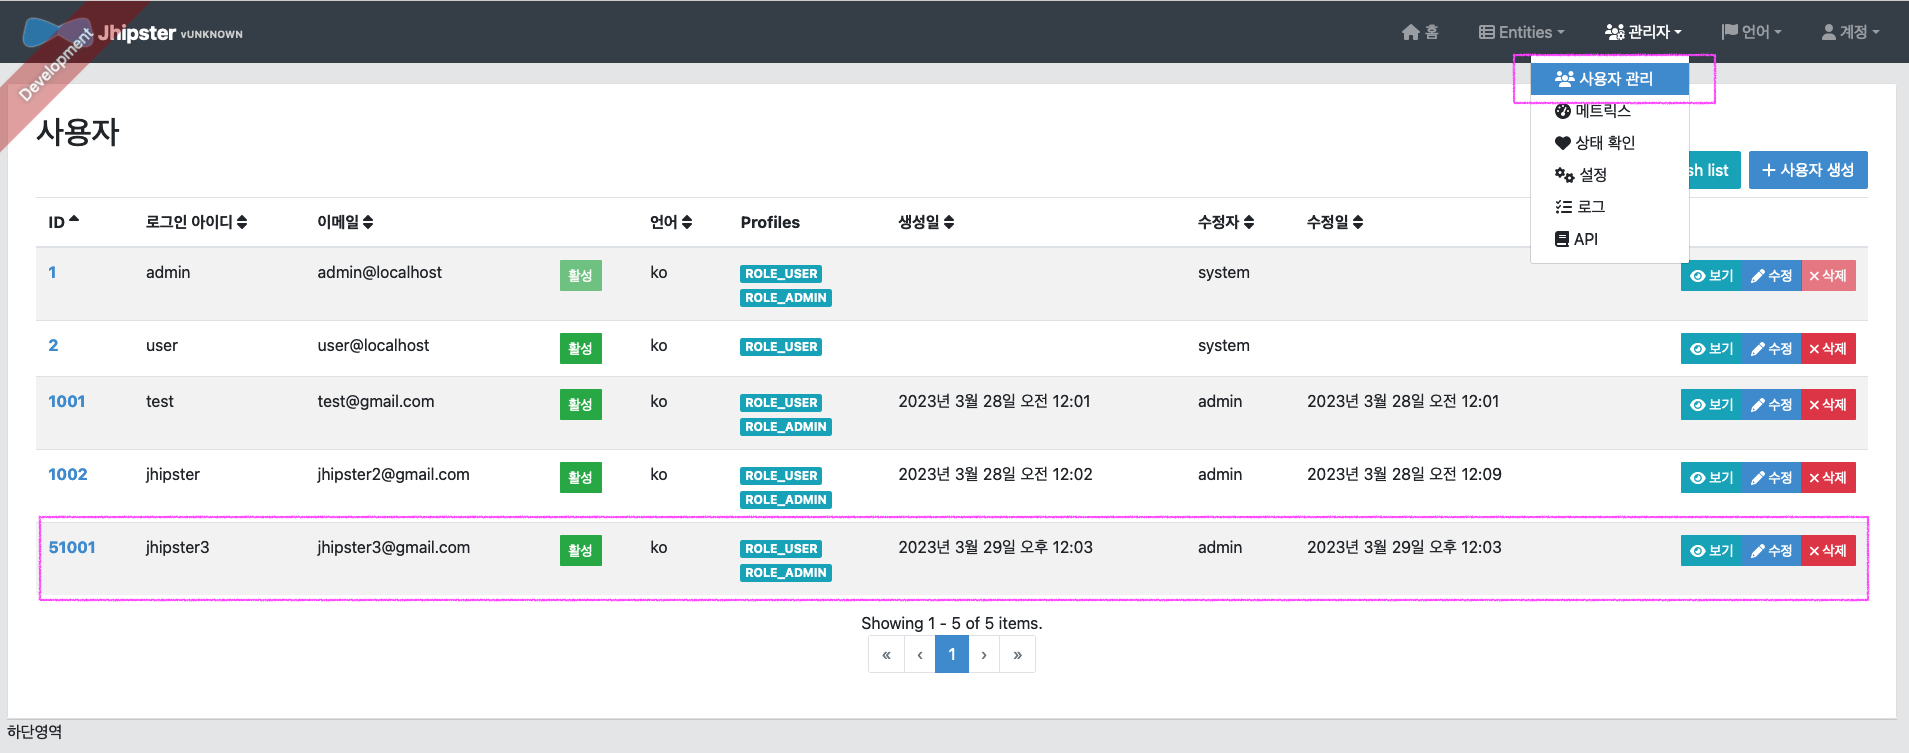
관리자 화면을 통해 유저가 생성되었는지 확인해보자.
관리자 > 사용자관리 클릭하면 아래 그림과 같이 신규로 추가한 유저를 확인할수 있다.
사용자 수정 테스트
- Method : PUT
- url : http://localhost:8080/api/admin/users
- Authorization
- Body 부분에 아래와 같이 입력 (firstname, lastname, email 주소 변경)Send 버튼을 클릭하여 사용자 정보 수정진행.
1
2
3
4
5
6
7
8
9
10
11
12
13
{
"id": "51001",
"login": "jhipster3",
"firstName": "jhipster333",
"lastName": "jhipster333",
"email": "jhipster233@gmail.com",
"activated": true,
"langKey": "ko",
"authorities": [
"ROLE_ADMIN",
"ROLE_USER"
]
}
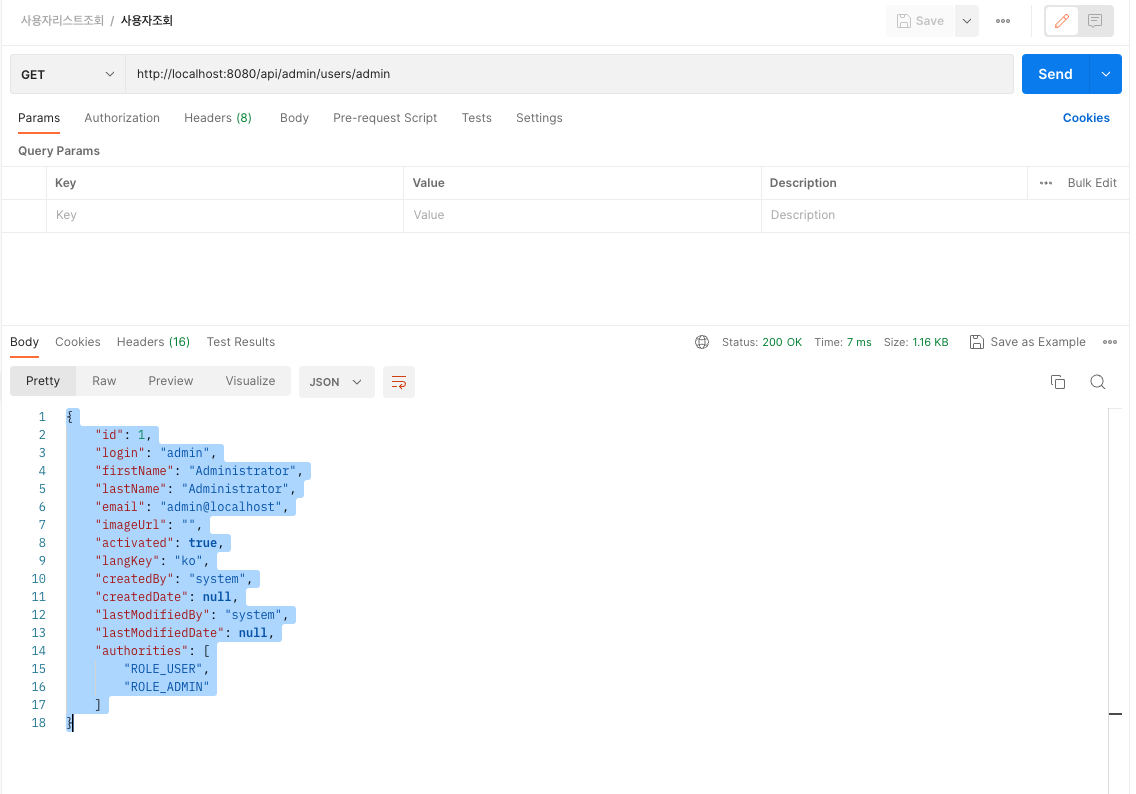
사용자 조회
- Method : GET
- url : http://localhost:8080/api/admin/users/admin
- Authorization : 위와 동일하게 입력
- Body 부분 none 선택
- Send 버튼을 클릭하여 사용자 정보 조회
- admin에 대한 정보가 리턴된다.
1
2
3
4
5
6
7
8
9
10
11
12
13
14
15
16
17
18
{
"id": 1,
"login": "admin",
"firstName": "Administrator",
"lastName": "Administrator",
"email": "admin@localhost",
"imageUrl": "",
"activated": true,
"langKey": "ko",
"createdBy": "system",
"createdDate": null,
"lastModifiedBy": "system",
"lastModifiedDate": null,
"authorities": [
"ROLE_USER",
"ROLE_ADMIN"
]
}
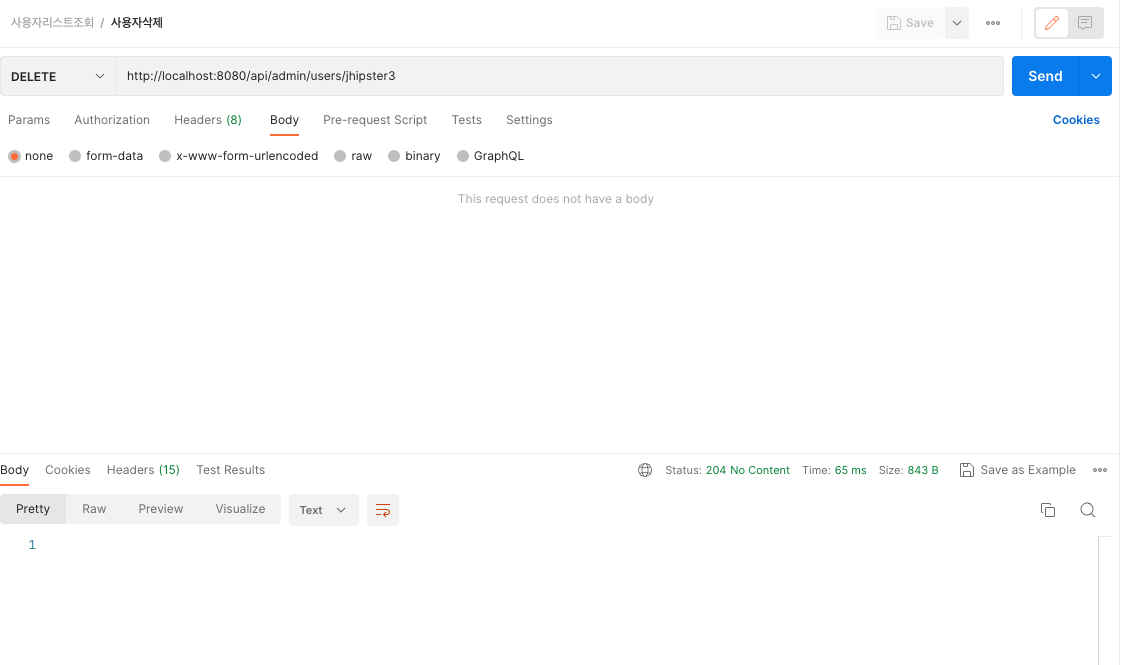
사용자 삭제
- Method : DELETE
- url : http://localhost:8080/api/admin/users/jhipster3
- Authorization : 위와 동일하게 입력
- Body 부분 none 선택
- Send 버튼을 클릭하여 사용자 삭제
요약
jhipster 와 postman을 이용하여 restapi를 테스트 하는 방법에 알아보았다.
정말 힙한데 라고 생각한다면 성공한것 같다. 일일 100만명씩 들어오는 사이트가
되길 희망하며 글을 마친