6. Nginx 설치
aws freetier linux + Nginx + MariaDB + SpringBoot 조합으로 설치를 진행하겠습니다.
그 첫번째로 Nginx 설치를 진행하겠습니다.
1. 개요
https://news.netcraft.com/archives/category/web-server-survey/
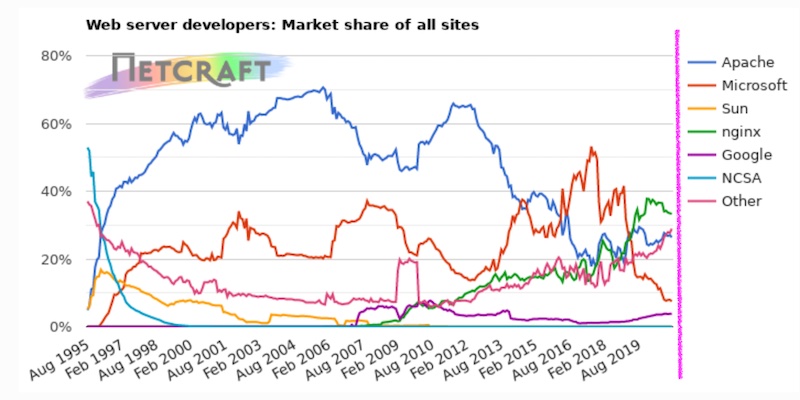
netcrat의 21년 웹서버 점유율을 보면 아래와 같습니다. 비동기로 동작하는 nginx 는 apache 보다 가볍고 속도도 더 빠르다고 합니다.
아래 데이터를 보더라도 nginx 가 apache 를 앞지르고 있는것으로 보입니다. 그래서 저도 nginx 로 설정하겠습니다.
| Developer | December 2020 | Percent | January 2021 | Percent | Change |
|---|---|---|---|---|---|
| nginx | 411,191,213 | 33.48% | 399,330,927 | 33.33% | -0.15 |
| Apache | 332,420,092 | 27.07% | 316,046,149 | 26.38% | -0.69 |
| Microsoft | 97,532,495 | 7.94% | 89,781,136 | 7.49% | -0.45 |
| 46,924,883 | 3.82% | 46,190,660 | 3.86% | 0 |
2. Nginx 버전
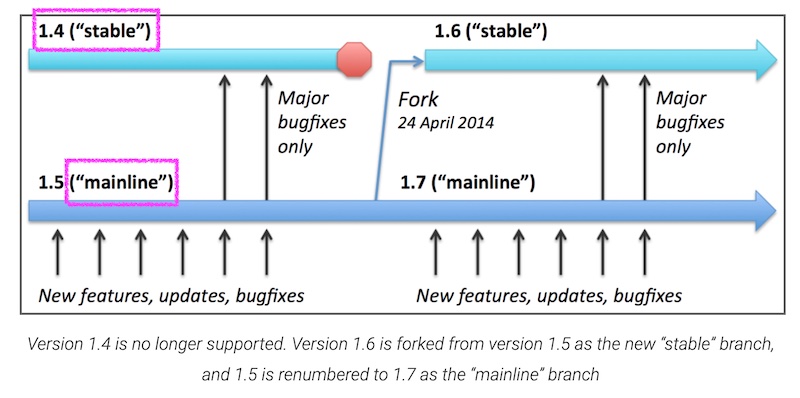
Nginx는 MainLine 버전과 stable 버전 2가지가 존재 합니다. 메인라이는 새로운 기능 및 업데이트 및 버그 패치가 동시에 진행되고 stable 은
메인라인에서 버그패치만 진행하는 버전입니다. 메이저 버전을 올리고 싶지 않고 사용하고 싶다면 stable 버전이 좋겠지만 전 최신 기능과 update
및 버그 픽스가 동시에 이루어지는 mainline으로 설치를 진행하겠습니다.
3. Nginx 설치
Nginx 설치를 위해 의존성 있는 패키지 설치를 진행합니다.
1 | ubuntu@goodsaem:~$ sudo apt install curl gnupg2 ca-certificates lsb-release -y |
메인라인 패키지 리스트를 추가 합니다.
1 | ubuntu@goodsaem:~$ sudo echo "deb http://nginx.org/packages/mainline/ubuntu `lsb_release -cs` nginx" | sudo tee /etc/apt/sources.list.d/nginx.list |
패키지를 업데이트 합니다.
1 | ubuntu@goodsaem:~$ sudo apt update |
업데이트시 아래와 같이 NO_PUBKEY ABF5BD827BD9BF62 에러가 발생한다면 키를 업데이트 합니다.
<<< @/freetier/z106/1.sh{1,5}
1번 라인과 같이 키를 업데이트 합니다.
<<< @/freetier/z106/2.sh{1}
패키지 업데이트를 재시도 합니다.
1 | ubuntu@goodsaem:~$ sudo apt update |
nginx 를 설치합니다.
1 | ubuntu@goodsaem:~$ sudo apt install nginx |
설치된 버전을 확인 합니다. 1.19.8 최신 버전으로 설치 되었습니다.
1 | ubuntu@goodsaem:~$ nginx -V |
4. AWS 보안설정 변경
http 및 https 로 접속하기 위해서는 aws에 인바운드 (들어오는쪽)에 방화벽 설정을 해주셔야 됩니다.
아래와 같이 aws 콘솔에서 EC2 > 인스턴스 > 인스터스 명을 클릭하시고 보안 탭에서 보안그룹의 보안
그룹번호를 클릭합니다.
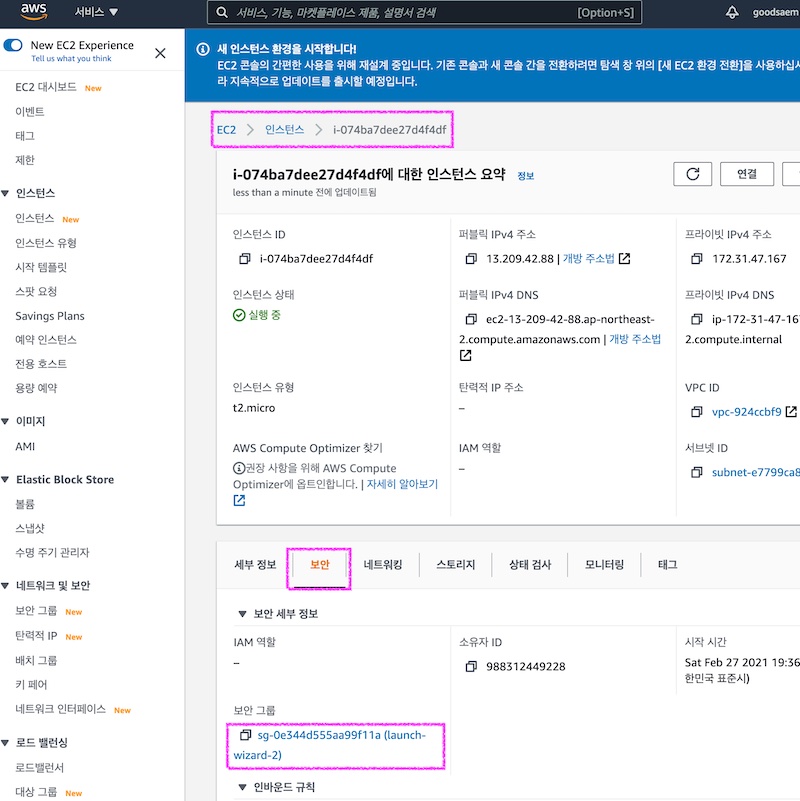
인바운드 규칙 변경을 통해 아래와 같이 http , https 에대한 규칙을 추가합니다.
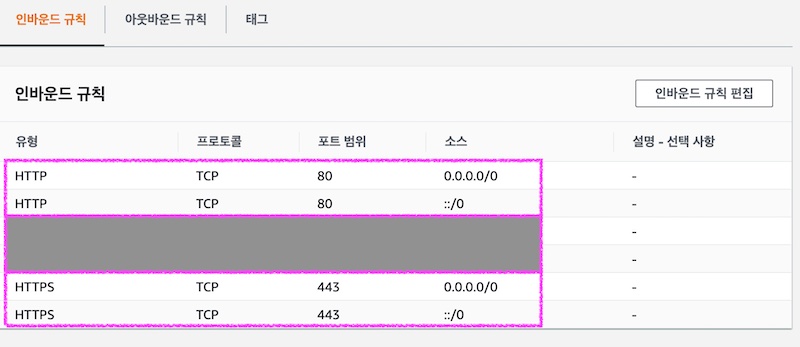
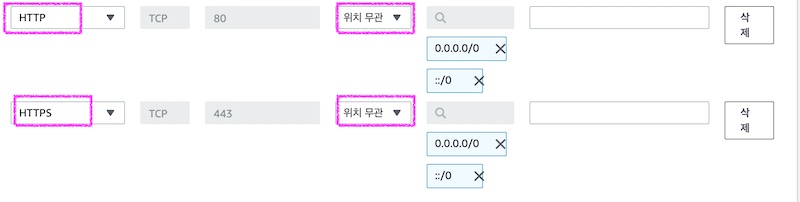
규칙 추가는 인바운드 규칙 편집 버튼을 클릭하여 아래와 같이 http,https 위치무관이라고 선택하고 저장하시면 됩니다.
5. Nginx 시작
아래 명령어를 입력하여 nginx 를 시작합니다.
1 | ubuntu@goodsaem:~$ sudo systemctl start nginx |
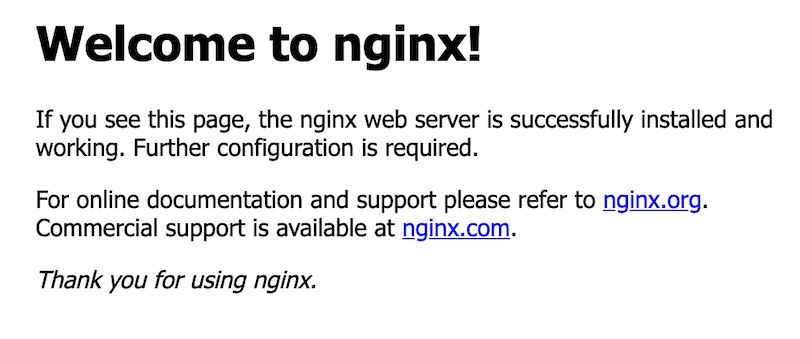
웹브라우저에서 http://goodsaem.ml 접속해서 아래와 같은 화면이 나오면 설정 완료 입니다.